25mm Sci-fi


6mm Sci-fi


1/1200 Sci-fi

They are a bit of a rush job as we are hoping to get a game in next month, and I may return to them to add some banners and scenic elements on the bases.
 |
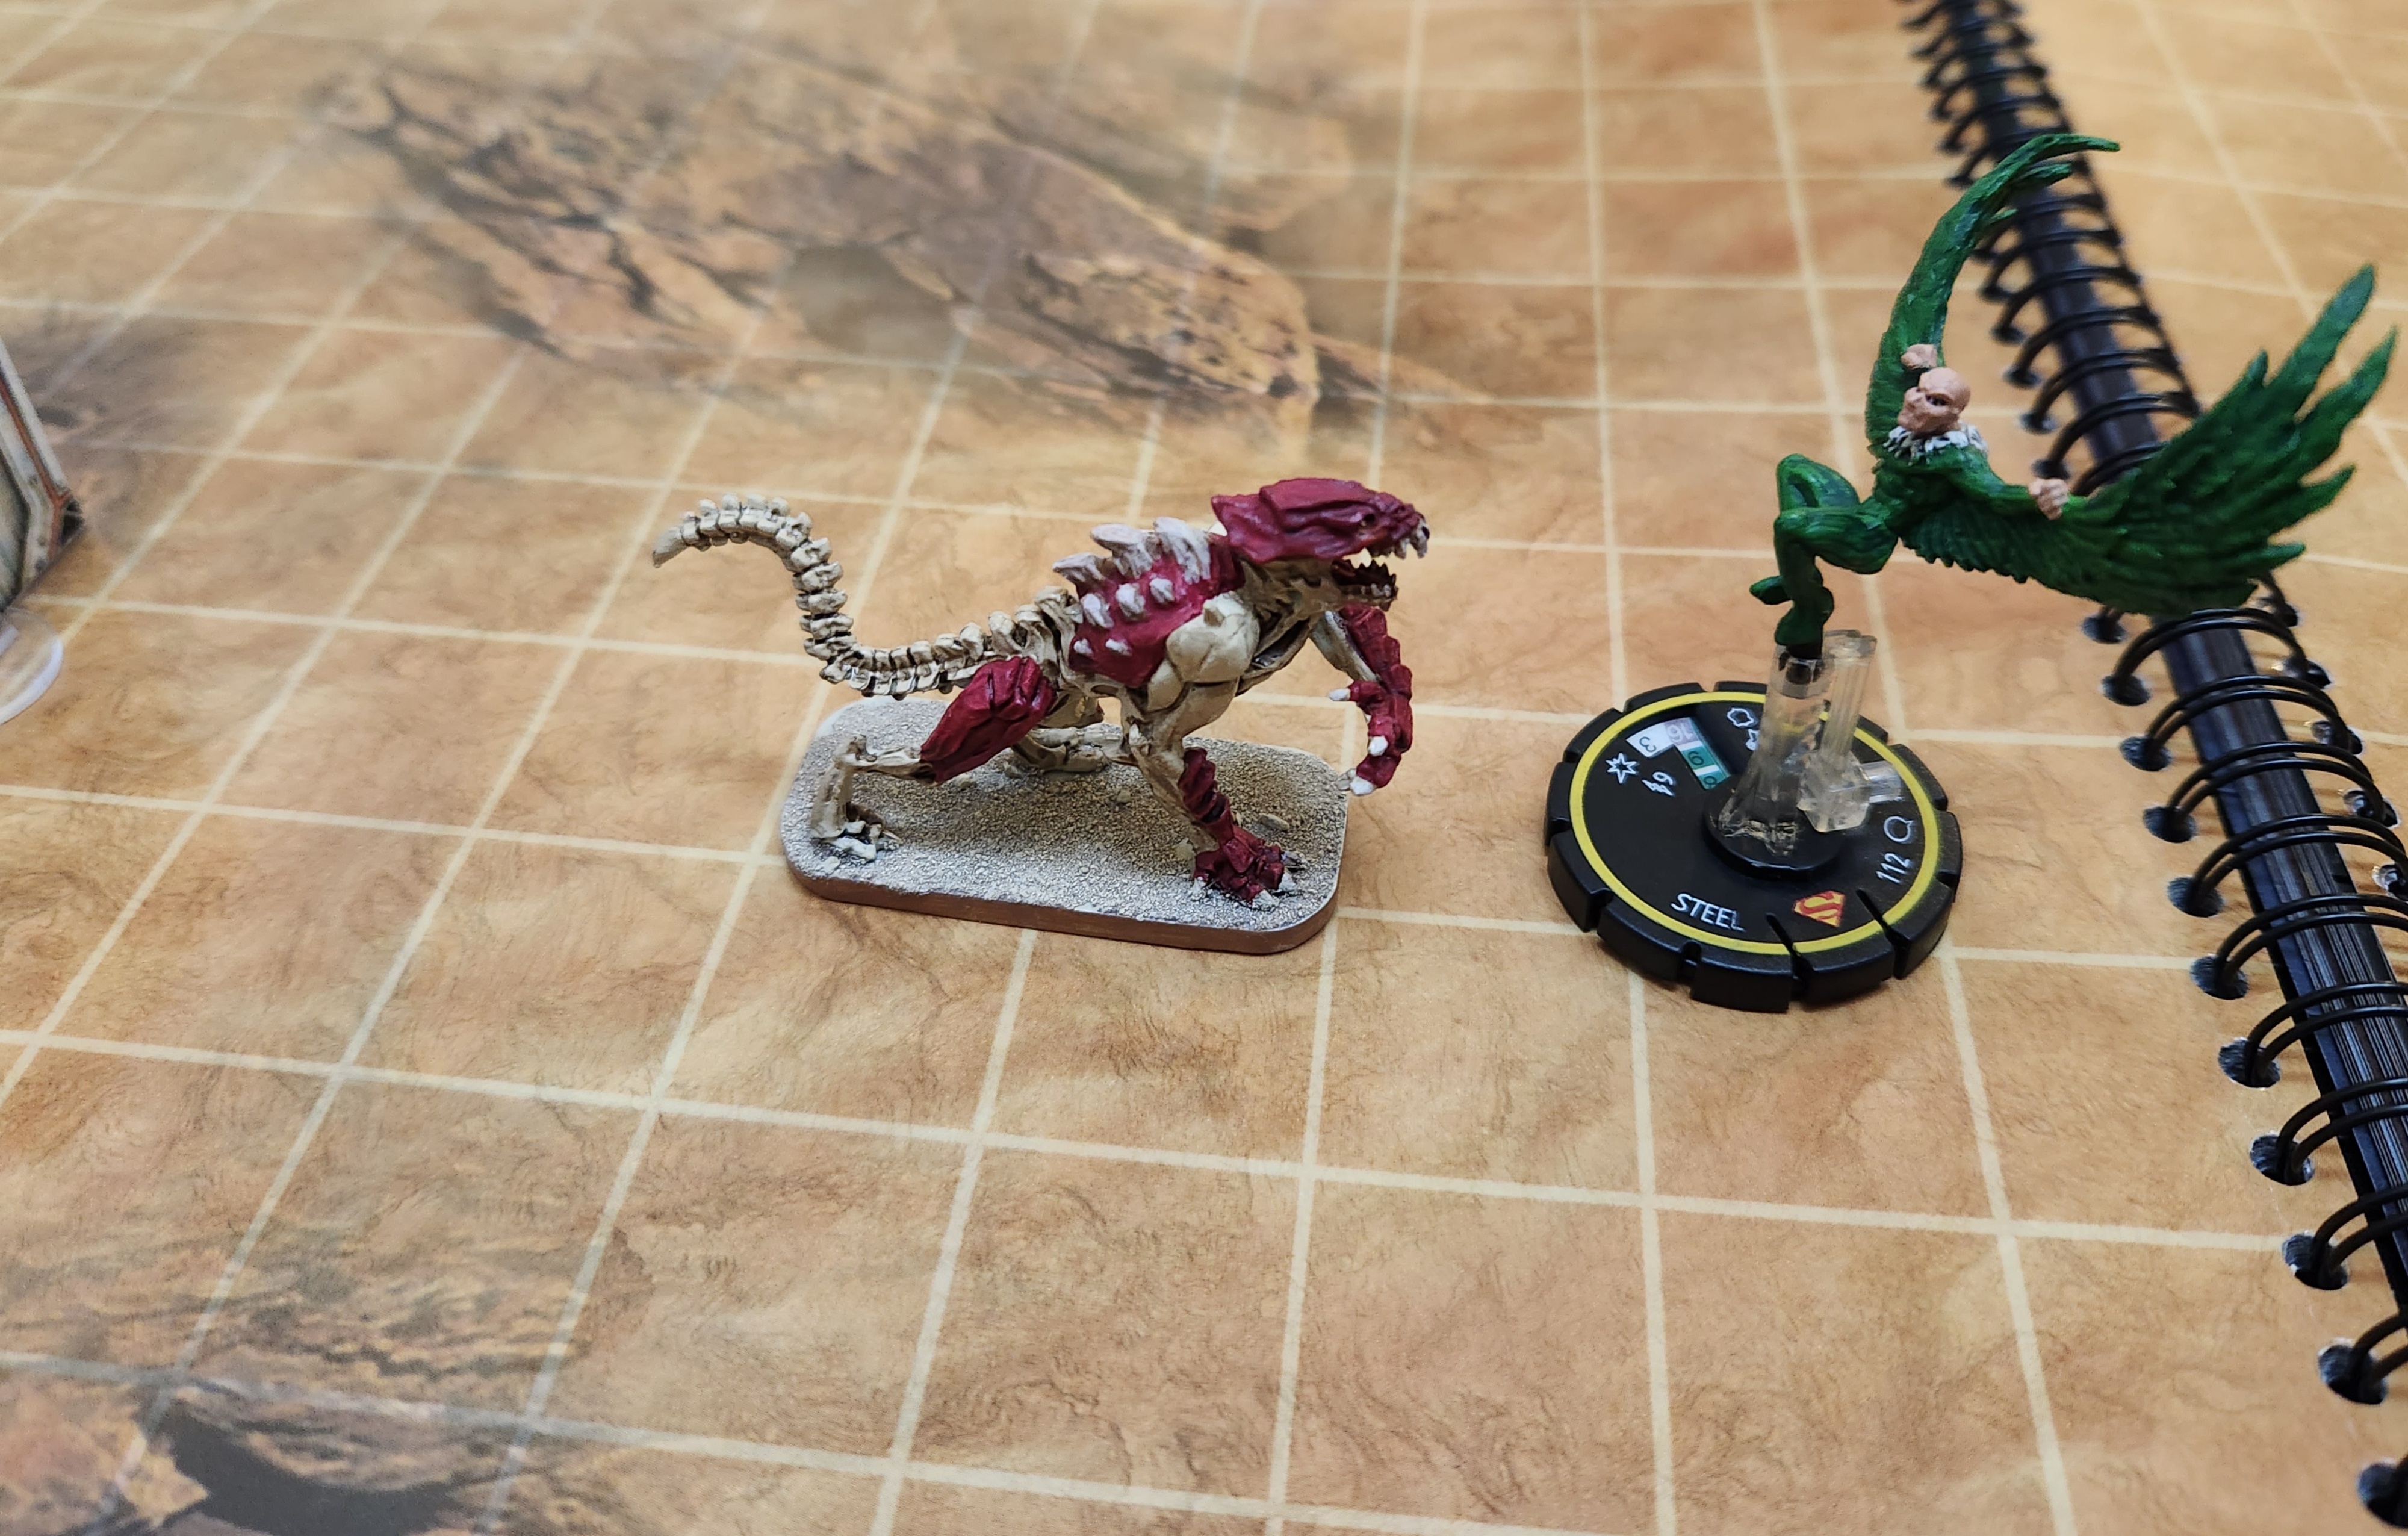
| Stronskey battles the HR's titan |
The plot for this session came organically from the sessions that came before. I knew my players wanted a titan vs. titan fight, but to make that the whole session would mean a very short game. I decided that a mission to sabotage the titan would allow a more traditional exploration format, while having an impact on the final confrontation.
The interior of the titan was based on The Fallen Titan.
I enjoyed running this campaign, but the format of the typical MCC module does get a but repetitive after a while. If we do return to the setting again, which I hope to, I will probably want to try a different style.
We will be taking break from our sessions until next year, when I hope to start running a Fantasy Age 2nd Edition campaign. Have a good year-end season.

One late summer night the sky north of our mutants' village was lit up by a shooting star, and for the next three days a fire burned in the forest where it landed. A few weeks afterwards, a hunter from a village near the forest came to our heroes, telling a tale of cave entrances that appeared on the side of the crater made by the shooting star, and strange green mutants who attacked him.
Realising that the "cave entrances" may in fact be entrances to underground facilities of the Ancients exposed by the meteor strike, Ah Meng tasked our heroes to journey there and to learn where they lead to, and about the strange green mutants.
Ranggup, Rex, and Tom (see PC profiles here) followed the hunter to the crater in the forest. The crater was a quarter of a mile across. below the lip, almost directly across from each other, were two openings that lead into the earth. At both entrances were HR troopers, standing guard. Above the entrance across the crater from our mutants, they HR troopers have set up some sort of a hoist, and were lifting barrels that were being brought out of the entrance.
Our mutants overcame the HR troopers guarding the entrance, and followed the passage that led from there to the ground below. It soon became clear that the facility was once a mining complex of sorts. While exploring the living quarters of the miners, our mutants noticed the strange green mutants whom the hunter spoke of, but managed to hide from them while they passed them, traveling in the opposite direction from our mutants.
Descending deeper into the complex, our mutants came across what must been the processing plant of the mining facility. A passage led deeper into the earth, and our mutants could feel heated air coming from there. Our mutants donned the protective gear that were in the processing plant (cutting holes in them to accommodate wings and large ears...), and entered the passage.
The passage opened into a large cavern whose floor was covered in a yellow lava. Across the pool of lava was a steel platform. A pipe connected to a pump on the platform was drawing the lava from the pool below. Standing next to the pump were several HR troopers, and a man Rex recognised: Proteus!
Proteus ordered the troopers to kill the mutants, then turned and left. Tom flew up across the pool of lava to attack the troopers, but was shot and fell into the lava. Rex and Ranggup made their way to the platform, and climbed up, all the while under enemy fire, and after a hard fight managed to take out the HR troopers.
But as they stood on the platform mourning the loss of Tom, the lava began to glow even brighter, and from the surface of the lava Tom emerged, his body shining. Reunited, our mutants chased after Proteus, but found that he and the HR troopers have left the complex.
Our mutants returned to complex and studied the processing plant more carefully. They soon realised that the plant processed the yellow lava into the yellow liquid that flowed in their dormant titan - with this source of yellow liquid, perhaps they can reactivate Stronskey the titan? Yet amidst their excitement, our mutants also had a worrying question: why was Proteus extracting the yellow lava?
Prepping and Running the Game
This session was based on the MCC module A Fallen Star for All. Once again I stripped most of the plot out and just used the basic premise and the maps for our game.
The death and resurrection of Tom was a railroaded event, as I wanted to give the character a new mutation to replace the one which he lost in the previous session. Once again I had the player draw a random mutation card, and the new power of Light Bearer just happened to fit the narrative.
The reappearance of Proteus and the hint of HR having a titan of their own sets up the next session of the campaign, which is the finale session.

Once again, our mutants receive a call for help from another village. Pyr, a mutant groundhog, had come to seek the help of our heroes to find a cure for a deadly disease that had afflicted his village. The symptoms of the disease was documented in the records of the village, along with where the cure might be found. Seekers from the village had gone to search for a cure, but none had return.
At Pyr's advice our heroes followed him to the site mentioned in the record instead of heading to the village, to avoid catching the infection themselves.
When they arrived at the site, they saw only a field of tall grass and no building. Flying overhead, Tom (see PC profiles here) saw the dead body of a mutant goat (which they later identified as Koln, a seeker from the village), but was attacked by a giant owl, which our heroes managed to chase off. Exploring further, they found a hatch which led to an long flight of stairs that led deep underground. Leaving Pyr at the surface, our heroes ventured in.
At the foot of the stairs our heroes came upon an open door. Beside the door was a plan of the facility, although our mutants could not understand the symbols on the plan. Entering the facility, they saw two sets of footprints: one reptilian and one crustacean, corresponding to Prokk and Voov, the crab and alligator mutants from the village. They decided to make a systematic search of the facility to find the cure for the disease, which the records would bear certain symbols (a copy of which was given to them by Pyr)
They followed the footprints to a door, and realised that while two sets of footprints entered the room, on one set (the reptilian one) exited it. The room turned out to be a cryogenic chamber holding a number of mutants. One of the cryogenic chambers had broken open, and a large black slime organism hiding on the ceiling dropped down on Batte and began to digest him. Rex and Tom attacked the slime with fire, driving it off Batte, before the trio beat a hasty retreat out of the room.
Exploring further, our mutants found a lab containing several glass-fronted storage cupboard full of chemicals, including one with the symbol Pyr had shown them! Stuffing their bags full of the chemical, our heroes continued exploring the facility, following the reptilian footprint, they found that it led to a place in the corridor where there were signs of a struggle, and from there on the footprint appeared different.
The altered footprints led the quarters of the staff who once lived there. There, they found a dead alligator on one of the beds. The alligator was in animal form, but was clad in humanoid clothing that obviously did not fit it. Searching through the clothing, our mutants realised that the alligator was Voov, but "demutated".
The mystery of what attacked Voov and demutated him was soon solved, as our heroes were attacked by a security droid that grabbed Tom and injected him with a solution. Our mutants disabled the droid and broke it open, and found that the needle which the droid used to inject Tom was connected to a vial that bore the same symbols - DNAX - as the cure Pyr told them to find! At the same time, Tom realised that he had lost his mental mutation power!
Our heroes went on to explore the final room in the facility, which turned out to be the infirmary. Here, they encountered a medical droid, and questioned it. It turned out that the facility was a medical research lab, and DNAX was one of the compounds created by the scientists to reverse mutation. Our heroes described the symptoms of the illness to the droid, who told them that no cure to the disease had been made yet, but the droid was able to isolate the virus from Voov's body and synthesise a cure.
Our heroes emerged from the infirmary to see another security droid headed their way. The fled back to the lab, and for a while considered destroying the stock of DNAX in case they fell into the wrong hands, but eventually decided against it.
Returning to the surface, they were met by an eager Pyr, who was overjoyed that they had found DNAX, and asked that they be handed to him so he could teleport back to the village to save lives immediately. Our mutants were suspicious of Pyr by now, and when Pyr became agitated Batte injected him with a vial of DNAX. Pyr turned into a groundhog before their eyes, and scurried into the tall grass.
Our mutants made their way to the village, and found that there had indeed been an infection, which the medicine they brought cured. Their mission completed, our heroes reevaluated the situation, and decided to return to the facility and destroy the remaining stock of DNAX. But when they arrived, they found that someone else had been there and taken away a number of vials while they were away. Dejected, they destroyed the remaining samples, and then concealed the entrance to the facility as best they could, and returned home.
Prepping and Running the Game
This session was based on the MCC module Phage from Below.
As with the other modules, the original plot was too complicated for me. I decided to substitute it with one of my own that would link the other NPCs and the villain of the series to a plot that will culminate in the finale.
Jaffar, as it turned out, was hired by Proteus - the villain from our previous season and now head of "Humanity's Restoration"- to recover DNAX from a the facility. Jaffar then colluded with Pyr to release a virus into the village to compel them to send their seekers to go into the facility - the bit about the ancient records were all made up by Pyr. When the seekers all died in their quest, Jaffar suggested that Pyr approach our PCs to get the job done. I imagined that Jaffar was waiting nearby when the PCs had their confrontation with Pyr, and that he afterwards sneaked into the facility and grabbed whatever DNAX he could carry.
I am not sure why my players decided against destroying all the DNAX once they realised something was off, but it does allow me to use that as a plot point for the finale.

For our November session we managed to get five players for another grid-based Napoleonic Game.
We played the action of the Austrian left flank at the Battle of Sacile.
FG, Adrian, and I, playing the Franco-Italian force, slogged through the forests and marshes surrounding the Austrian-held towns of Palse and Porcia instead of approaching them in the open; as a result our attacks went in piecemeal, and the Austrians were able to hold on to Porcia by the time the clock ran down, winning the game.
After the main game Adrian took us through a game of Undaunted: Battle of Britain.

I thought the flow of the game didn't really resemble aerial dogfighting, but it did give me an appreciation of the Undaunted game mechanics, and make me want to give the original Undaunted game a try.
For our December game we are planning a game of the second edition of Conquerors & Kings, so stay tuned.
Kong, Ranggup, and Tom (see PC profiles here) traveled with Jaffar to the facility in the middle of the desert, but found that a Deathclaw - a carnivorous beast - had made its lair at its entrance. Tom was able to lure the Deathclaw into an area of soft sand, where the mutants managed to kill it, but when they made their way to the entrance they found two Deathclaw cubs there, which Ranggup decided he would adopt and bring back to the village.
Jaffar opened the door to the facility using a passkey, and our mutants found themselves in a lift that took them deep under the desert floor. When the loft door opened, they found themselves in a large, dimly lit room that was the scene of carnage - many skeletons and destroyed robots were strewn all over the floor. Our mutants found themselves being scanned by laser, and soon afterwards a voice spoke to them, informing them that they were trespassing on a United States Army facility, and asked them to identify themselves. Our mutants replied that they were there to recover a suit of armour, and after a long pause, the voice instructed them to proceed to a console and retrieve a widget there, and to proceed to a lift at the other end of the room.
The voice explained that its name was Dreadnought, and that it was the Artificial Intelligence in charge of the security of the facility. Many years ago, it explained, the security of of the facility was breached by enemies of the state, who tried to lock Dreadnought out of the system and corrupted the security droids, which then killed all the scientists and workers within the compound. Fortunately, Dreadnought retained control of the lobby level and its wall-mounted lasers, which it then used to destroyed the rogue security droids. It then placed the facility under lock-down until the proper authorities arrived, but they never did. Now, it requested the party to retrieve the weapon arms of the suit of armour from the various levels of the facility, and then to unite them with the main chassis of the armour, so it could leave the facility before the enemies of the state could arrive.
Our mutants followed the directions of the AI, and traveled to the manufacturing level and then the weapon range, overcame the surviving security droids there, and restored control of the levels to Dreadnought by inserting the widget into the consoles of each level. Finally, Dreadnought instructed our mutants to go to the research level, where they would retrieve the passkey from the dead body of the head of the facility, which would allow them to access the armour.
Our mutants followed the instructions, but when they entered the research level they were confronted by a droid that resembled a large mechanical spider. After ascertaining their identities, the spider droid revealed that it was an Artificial Intelligence that preserved the memories of Dr Martin, the head of the facility. Dr Martin told our mutants that Dreadnought was in fact the codename for the power armour and the Artificial Intelligence that inhabited it. Dreadnought was originally designed to take over the functions of the power armour in the event that its human operator was incapacitated so it could remove itself and its operator from the site of danger. However, the AI came to the conclusion that it could better protect its occupant if it was in charge of all of the suit's functions even while its occupant was fully competent. Realising this, Dr Martin decided to shut the AI down, and began to disarm Dreadnought under the pretext of upgrading its weapons. But Dreadnought soon saw through the ruse, and ordered the security droids to kill all the humans within the facility before they could disable it. Dr Martin was able to use the wall-mounted lasers to destroy most of the droids and to lock Dreadnought out of all of the levels except the lobby level. He hunkered down in the research level with a few of his colleagues and waited for help to arrive, but when it became clear that no help was coming, he transferred his memory to a separate AI which inhabited a spider droid, so he could warn anyone who came after his death of Dreadnought's intentions.
For a while our mutants wanted to help Dr Martin, but when they realised that they were at Dreadnought's mercy while they remained in the facility, they destroyed the spider droid and located Dr Martin's mortal remains, and took from it the passkey. They then took the precaution of disabling the weapon arms.
Once they restored control of the level to Dreadnought, they were instructed to bring the weapon arms and the passkey to the lowest level of the facility: the vault.
Our mutants used the passkey to enter the vault, and there they saw Dreadnought, a hulking suit of armour taller than a man. Robotic arms there affixed the weapon arms to the chassis, and Dreadnought awoke and started to move towards the lift. Our mutants followed it, and together they all traveled to the surface level.
Outside the facility, they were met by Jaffar, who was ecstatic when he saw Dreadnought. However, his joy soon turned into panic as Dreadnought refused to follow any of his instructions, but simply walked into the desert. Jaffar followed the walking armour, all the while yelling orders at it, and left our mutants behind.
Prepping and Running the Game
This session was based on the Fallout: The Roleplaying Game module Fully Operational.
I followed the basic premise of the module rather closely, but changed certain elements that did not fit my vision of the post-apocalyptic world, and streamlined it. There was a little more role-playing this session that the others, but once again there was no "right answer" to the situation.
Jaffar was of course a reference to Jafar in Aladdin - I had the idea that in the even the PCs refused to hand over Dreadnought to him, he would leave them locked within the facility.
Following the original module, I had Dreadnought walk off into the sunset to enjoy its newfound freedom. I do hope to bring him back in a future session though.

Prepping and Running the Game
This session was based on the Mutant Crawl Classic module Mayhem on the Magtrain. Once again I found the module to be a little more complicated than necessary (although it was thematic), but was able to take the central premise of the story and have a fun, full session.
When first told about the Locust People my players took the threat seriously, and the first hour of the session was spent gathering information, scouting, and making a plan of attack. Knowing that the Locust People were in fact just an excuse for the PCs to enter a cave and be forced into a runaway train, I briefly contemplated making the whole session about fighting the Locust People instead, but decided to stick to the plan. In my defence, I had informed them that the session would be "a bit rail-roady" in advance, which one of the players took to mean that it would take place on a train.
The players were a little concerned and disappointed that their characters were not the ones to end the Locust People threat, and I had to comfort them by telling them that there isn't always a "right way" to "solve" an adventure, and that sometimes the game was just to explore and deal with whatever happens. That's the OSR way.

I am actually two AARs behind on our Savage Gamma World campaign, but since it is faster to wrote a wargaming AAR than an RPG AAR...
We were planning to play another Napoleonic game on Sunday, but due to unforeseen circumstances only Fg and myself were able to meet up for the session, so we decided to instead play something I have been planning for for a while, and something that just came up recently.
The first game we played was Arrowstorm, a recent release by Dan Mersey. I was actually a playtester for the game in its previous incarnation many years ago, so I was excited to get a copy of the rules when they were released this month. The rules cover the period from the Norman Conquest to the Hundred Years War, and I was hoping to use them for Wars of the Roses too, but given that this was October, I decided to take my Dark Ages collection out and fight the Battle of Hastings.
The rules utilise a tile system, which allows me to use my Undaunted: Normandy tiles. They are a tight squeeze with the 15mm figures we used, but I like the look. In the original game players placed order token onto a shared order chart, but I thought it would be easier to just print the order chart out, glue it onto a piece of card, and cut it into counters which the players can take instead.

The game is rather, well, game-y. You take turns to choose a limited menu of orders from a common pool, which you can then use during the upcoming turn. However, you may choose orders which your troops cannot actually execute just to deny them to your opponent - in our game I (playing the Anglo-Danish) chose the Shoot order on many turns even though I had no missile troops simply to deny them to the Normans, who had missile troops.
The game flowed well enough. In our game the Normans charged the English left flank, but then their cavalry was defeated when they charged up the hill. Fg sent his spears round the English flank, but as I held a unit in reserve they were able to hold them off until I could deploy more units from the main line.
I will see if I can make up scenarios for Wars of the Roses for these rules in the future.
For the second game we played FiveCore Company Command, a game by Nordic Weasel, but not exactly. You see, I have been looking at the Undaunted: Normandy tiles for a while, hoping to use them with miniatures. They are unfortunately a little small, being only 9cm x 9cm, and while they are printed on both sides, there are only 18 tiles in a box, and I had to wait until Amazon Prime Day to order a second set to have enough tiles for our games.
Anyway, back to rules.
Our group were playing the Chain of Command rules several years ago, and have between us accumulated four 20mm armies. While we enjoyed the period, the CoC rules were not the easiest to play or remember. After trying out a few of the other Nordic Weasel games, I decided to give FiveCore Company Command a try, and thought that its depicted my idea of WW2 combat well enough. With some tweaking, I converted the rules to being grid-based, using a rough conversion of 1 grid = 6".

As you can see from the photo above, the tiles are even more crowded when using 20mm figures, and all the more so when vehicles are used. But the grid format made the game easy to play.
We played a scenario from a Chain of Command Pint-sized Campaign book, twice - the first time with just infantry, and the second time with a Sherman on the US side and an anti-tank gun on the German side. The Germans won the first game, and the US the second game. In both games the victory came after one side suppressed the other side and made a dash to/from the church on the upper side of the map across the open ground (tile 12B). The tank and the anti-tank gun we used in the second game did not actually end up having much influence on the outcome.
I enjoyed the games a lot, but the small size of the tiles was an issue for me. After the game I explored the options of recreating larger versions of the tiles, or even making similar larger tiles using the RPG maps I have been using, but there was no perfect solution. I think we will probably stick with the Undaunted tiles for now, and hope that they produce a deluxe edition with larger tiles someday.

Batte, Ranggup, Rex, and Vik (see PC profiles here) followed the villagers back to their home, and from there they followed the giant round footprints of the robot, which led up and over a ridge. From the top of the ridge, our mutants could see a giant structure at the floor of the valley below. At first they thought that it was a building, but they soon noticed the tracks on the ground behind one end of the structure, realised that it was in fact a giant vehicle with tracks, consisting of a tractor at the front, hauling two trailers behind it. All told, the vehicle measured 60 metres long, 20 metres wide, and 40 metres tall at its highest point. At the bottom of the side of the front trailer was a door, and midway up the wall they saw an opening, from which plants grew out of. They also saw the giant robot described by the villagers patrolling around the vehicle.
Our mutants watched and waited, until at last a ramp lowered from the rear trailer, and the robot walked up into it. Batte decided to fly up to the opening on the side to see if it could provide a way for the party to enter the trailer, but when he came near the opening a plant tendril lashed out and grabbed him by the foot and pulled him inside. Below, the other mutants could hear Batte screaming telepathically for help. Rex and Vik decided to throw Ranggup up towards the opening, and sure enough the plant grabbed ahold of Ranggup and pulled him in too. Once inside, Rangup lowered a rope to Rex and Vik below, who quickly climbed up. Together, the mutants struck at the plant until it released Ranggup, and then reduced it to a pulp.
Our mutants then left the room they were in by the only door out, and were quickly confronted by man-sized security robots. They were able to overcome the robots, but could not open any of the other doors they found at the corridor they were in, until they realised that they could use the head of one of the droids (which they had knocked off during the fight) to unlock the doors. After some exploration, they learned that they were in the living quarters of the humans who must once have crewed the vehicle. They eventually found the door to lift, which they took to the lowest level. When the door to the lift opened, they were once again attacked by robots, which they once more overcame. They then found the door that opened to the outside of the vehicle (which they saw from the outside) and tried to wedge it open with the inactivated robots, but flying drones soon came to begin to repair the robots. Our mutants realised that time was of the essence, and decided to find the missing villagers and leave the vehicle before the robots were repaired.
At level 2 of the trailer, they found a large room with screens that showed the different parts of the trailer, and realised that the villagers were being kept in cryogenic stasis tubes at level 5, along with dozens of other mutants. Venturing to level 5, they exited the lift only to be attacked by a large yellow ooze creature, which caught Vik with a barbed tentacle. In a panic Vik used his molecular disruption power on the ooze, which turned it into a puddle of liquid, but also rendered him unconscious.
The other mutants brought Vik's unconscious body to what appeared to be a laboratory. Here they realised that the cryogenic storage room was at level 6, which was not accessible by the lift, but via hatches in the ceiling of the lab. Our mutants manipulated the control panels of the lab in random fashions, until at last one of the hatches opened, and a mechanical arm holding a cryogenic stasis tube descended from the opening to deposit it. Batte seized the moment to fly through the opening, while Ranggup leapt onto the mechanical arm, and was taken up to level 6 too.
Once the hatch closed, Batte and Ranggup found themselves in a cold chamber filled with close to a hundred cryogenic stasis tubes, each holding a mutant. They were unable to find a way to activate the mechanical arms in the chamber, or otherwise cause the hatch to open again. Cold-blooded Ranggup soon became to fall into a stupor, while Batte once more began to scream telepathically to Rex below to find a way to open the hatch.
Just then Vik woke up, and together he and Rex tried to work he control panels again, to no avail. In a panic Rex smashed opened one of the panels and peed onto it, which caused some sort of alarm to go off and a voice to announce that a fault had caused the cryogenic system to go into failure and that all the specimens held in stasis would die if not released from stasis in 15 minutes!
Vik proposed to Rex that they searched somewhere else for a solution, and the two took the lift to level 4, where they found the infirmary of the trailer, and found a robot doctor. The robot doctor was initially confused by the presence of our mutants, but once it had learned of the situation from our duo, its programming kicked in and it offered to help reverse the cryogenic process. However, there was not enough time left - only 66 out of the 99 mutants held in stasis could be saved before the time ran out; our mutants were able to save 6 of the 8 mutants recently seized. Our heroes herded the survivors out of the trailer, and they quickly put as much distance between themselves and the vehicle as they could.
When questioned, the other revived mutants all told the same story: they were going about their own business when they were attacked and seized by the giant robot. None of them could tell how long ago they were taken, and how far away they must be from their homes. Some of the mutants decided to follow our heroes, while others decided to strike out on their own to try to find their homes, and so they parted ways.
Prepping and Running the Game
This session was based on the Mutant Crawl Classics module "The Apocalypse Ark", which features a vehicle of “the ancients” with a mission to find and collect different species. The original story had a villain (who had taken over control of the vehicle and its AI), but I removed that character and plotline and instead just used the vehicle and its attached robots as a basis for this session.
The set-up was pretty standard, with the PCs exploring the “dungeon” and overcoming its various denizens. The players did do rather poorly towards the end of the session, which was probably due to a combination of boredom and frustration from lack of clear direction. I will have to manage this better in the future.


After the defeat of the Army of Dawn, our mutant heroes returned to their village and led them across the Barrier Peaks to set up camp near Truffaut's bar.
Not long afterwards, mutants from nearby villages reported being attacked by human raiders with firearms, who would drive the villagers off before seizing their food and materials - those who resisted were killed. Some mutants tracked the raiders back to their lair, and learned that they were based inside a half-buried metal giant at the place the locals named Titan's Beach. At Traffaut's request, Ah Meng, the head of the mutants, sent Kong, Rangup, Rex, Tom, and Vik (see PC profiles here) to eliminate the threat of the raiders.
After traveling for two days, our mutants arrived at Titan's beach as the sun was setting. There they found a metal giant, perhaps a hundred yards tall if he stood on his feet, almost completely buried in the sands of the beach, leaving only his head and two hands exposed. A semi-circle of stone obelisks surrounded the Titan. As they watched from the distance, a patrol of a dozen soldiers exited the mouth of the Titan via a rope bridge, and began their trek north.
As the mutants planned their next move, they were approached by an old woman, who called herself Mama Clay. Mama Clay told them that she had lived at Titan's beach for many years, and her peace and quiet were broken by the arrival of the humans a few weeks ago. When she learned that our mutants were here to get rid of the humans, she offered them a healing potion, and information about the newcomers.
Out mutants neutralised the two soldiers guarding the mouth of the Titan by means of distraction and surprise, but found that their rifles were locked from use by mutants. Vik began to get a throbbing headache, which he knew was caused by the proximity to non-organic source of energy. The mutants descended the ladder that led from the Titan's mouth down its throat. The ladder led to a large chamber with a glowing glyph on the floor; a large metal beam around a foot wide pierced the ceiling of the chamber and entered the floor, piecing through the middle of the glyph. Two mechanical creatures in the shape of spiders were working at the beam, trying to cut through it with some sort of tool that formed their mandible that emitted a bright light. When they noticed our mutants, they stopped their work and attacked, but were quickly disabled.
Our mutants found two doors that led from the chamber, one with the symbol of a helmet upon it, and the other one with a hexagon upon it. They decided to go through the door with the helmet symbol.
The door opened into a corridor that led to a smaller chamber whose floor was crisscrossed by a number of metal pipes, some of which are leaking a warm, opaque yellow liquid. A rhythmic, whooshing sound could be heard coming from the pipes, and more yellow liquid would leak from the pipes with each "whoosh". Two doors led from this room. Our mutants split up to explore: one door led to a ladder that led to a small room where there was a throne-like chair and a helmet suspended above it by a cord hanging from the ceiling; the other door led to a corridor that led to the soldiers' barrack.
Our mutants decided to try wearing the helmet, but as it was designed for humans, only Tom could wear it. As soon as he put the helmet on, Tom's body became paralysed, and his vision went dark; but as his eyes adjusted he realised that he was looking through the eye of the Titan! He found that he could move his eyes to look around, but not his body. The other mutants managed to rouse Tom by removing the helmet.
Our mutatns then made their plans to attack the six soldiers resting in their barracks. Rex charged into their room and leapt onto the table where the soldiers were sitting around and released his paralysing gas; all but one of the soldiers were felled by the gas, and when he tried to reach for his rifle he was knocked out by Rangup, who wore a gas mask he scavenged earlier. After searching the belongings of the soldiers for loot, our mutants exited the chamber from the door at the other side of the barrack.
The door led to a long corridor that led to a large chamber with a domed roof. Here they could see the metal beam once more piercing the roof of the chamber and through a large machine on the floor of the room. Pipes led from the walls to and out of the machine, which a few soldiers were repairing. When they noticed the mutants, the leader of the officer cried out an order for his men to attack.
Vik charged into the chamber first, and using his mutant power disintegrated the leader, and then fell unconscious himself from exhaustion. The other mutants followed, and after a hard fight managed to dispatch all the soldiers.
But before they could rest, the chamber began to lurch as the machine on the floor began to hum rhythmically. As our mutants struggled to keep their footing, they realised that the Titan was moving!
Kong hoisted the unconscious Vik over his shoulder, and together the party returned to the helmet room, where Tom once again put on the helmet. Once more he saw through the eyes of the Titan, and found that the Titan had waded into the sea. But as soon as the helmet had rested on Tom's head, the Titan stopped moving. This time, Tom found that he could control the movement of the Titan. He turned the Titan around, and walked back to shore. It took the mutants no time to decide that they should walk the Titan all the way back to their village, and use it as their new base.
Prepping and Running the Game
As Season 3 of our Savage Gamma World campaign follows the story of our previous campaign closely, I have decided to continue the numbering for our session reports.
One new thing I am trying out for this season is the use of a Mutation Deck to quick-generate new characters for players joining the campaign. I give a player a choice of playing a mutant human or a mutated animal, and a choice of psychic or elemental power (those are the choices provided in the cards). They draw two cards for the base mutation type and have the choice of one, then a choice of drawing two power cards in any combination and keeping one.
The scenario is from the OSR zine Knock! #1, and was originally more fantasy in flavour than sci-fi, but as with Expeditions to the Barrier Peaks showed us, genre-mixing was present in the early days of the hobby, and is something embraced by the current OSR community.
I was quite happy that the players managed to gain control of the Titan at the end of the session and wanted to use it as a home base for their village. However, they understood that a fully functional mecha will make them overpowered, and accepted it when I said that the Titan will run out of power once it reaches their village. They did ask about finding someone with the knowledge of reactivating the Titan and bypassing the lock on the rifles, which delighted me as now I have two story hooks and threads to use for future sessions.


I have done pretty well this year (so far) in terms of not buying more new figures; I did buy and convert and paint a couple of sci-fi models, but since these were meant for the collection of my friends, it doesn't really count. But I had to make an exception for the new Warhammer The Horus Heresy Mk VI Space Marines figures.
My first Warhammer 40K figures were the plastic "beakie" space marines box set, which I split with wahj; we painted them for use with the Battlesuit board game; mine were painted in white, while his were painted in black. Good times.
Years later, when the multi-part plastic Mk VII space marines became available, I decided to start expanding my army, but not wanting to paint a whole new army in white again, I decided to go for an easier paint scheme of Dark Angels green. The old beakies went to Adrian, but I've always had a soft spot for them.
So when the new "true scale" Mk VI marines were released, I decided to get them, and once again I split the box, this time with FG. In my fluff they represent the Veteran Squad in my chapter, and have the same colour scheme as the rest of the chapter. I did however give them the classic 80s stripe down the middle of the helmet.
These models are not exactly easy to build. The pauldrons with the studs actually come in two pieces and have to be glued together - you can see the seam in the photo if you look closely. The arms and weapons come in three pieces: left arm, right arm, and both hands holding the bolter; it took a bit of fiddling to make everything line up. The models are "true scale", and therefore stand taller than the Mk VII models, especially the earlier Mk VII models. The box comes with 32mm round bases, but I based them on some thinner 25mm round bases I had from another purchase, which compensated a little. They are built pretty much as is, "out of the box", but I replaced the sergeant's plasma pistol arm with a "modern" one to make him look more in line with the rest of the force.
I am very pleased with how they turned out, and hope to filed them in a game of Grimdark Future or Xenos Rampant soon.

Having escaped from The Provincial with Yulian, our party decided to take him to New Windsor in Jersey, where he claimed he had a safe house. They drove north, switch cars (stole a car) to mask their trail, but were still pursued by the Russian mob. After a gunfight in the suburbs, they barely made it to the safe house, where the gangsters ceased their pursuit.
Here they were taken in by Dmitri Pavlov, Yulian's uncle, who was formerly in the Tarasov crime family. Although retired, he still commanded a measure of respect from the Tarasov family, but he knew it would only gain his nephew a respite and not escape from Viggo's wrath. They informed Bruce of their location, and the fugitive policeman joined them (see PC profiles here). Soon afterwards, John Wick arrived at the door to politely inform Dmitri that Viggo had given Dmitri 24 hours to surrender his nephew.
Yulian made a desperate attempt to save himself and called Viggo to beg for mercy, but it was useless. Viggo then spoke to the party, offering to help Joseph and Mori pardoned by the High Table, and to use his political influence to exonerate Bruce, and to give Jason a job in the Tarasov family if they could find the person buying information from Yulian, and to eliminate him in a way that would leave a clear message that Viggo was the one who gave the order.
Realising there was no escape, Yulian beseeched our party to help get his girlfriend Charlie to safety, promising that they will find clues to who was really responsible for the murder of Roger Zelany through her. He explained that someone had approached his girlfriend at the exotic dance club where she worked to offer to buy information regarding the activities of the Tarasov family at a generous price. The money and information would be transferred through Charlie, so Yulian did not know whom he was selling the information to, except that they were from the Calabrian mafia. Charlie would hand part of the money to Yulian, while she deposited the rest in a number of bank accounts. When Roger Zelany, an associate with the Calabrian mafia was murdered, Yulian feared the worst, and decided to seek the protection of the FBI. He now feared that Charlie would be implicated, and asked the party to get her to safety, beyond the reach of both the Tarasov family and the Calabrian mafia. He handed the party a pendant he wore as a proof they were from him, together with a safety deposit key, and left a message on Charlie's phone, and awaited his fate
The party armed themselves from Dmitri's weapon cache, and took his car to the dance club. At the carpark they noticed that someone else was watching the club. They entered the club and waited for Charlie to come on stage. Soon afterwards two suspicious men also entered the club. When Charlie finally came on, Bruce moved to the stage and flashed Yulian's pendant at her, and the party left, hoping to enter through the back door and link up with Charlie. However, they found two men waiting in ambush at the alley behind the club. A firefight broke out, followed by sounds of gunshots from the front of the club. The party broke in through the back door to find dancers fleeing. They rushed to the floor of the club to find Charlie being held by two armed men.
Joseph quickly took down one of the gunmen, as well as two more who came through the front door, while Bruce knocked the other one out with a flying kick. They then grabbed Charlie and left, just when the sounds of police sirens were heard.
They explained the situation with Yulian to Charlie, and then drove her to a bus station, where she could take a bus out of town. Charlie told them that she too did not know who in the Calabrian mafia was buying the information from Yulian, but that the two people who contacted her each time were Ricardo, who Joseph shot, and Gabriel, who was knocked out by Bruce.
The party now realised that they had to get to Gabriel to learn who their boss was. Fortunately, Bruce had knew which hospital the police would bring Gabriel to for treatment of his wounds. Driving to the hospital, they stole a couple of orderly uniforms, put Bruce on a gurney, and wheeled him right up to the cop guarding Gabriel at the emergency room, where Bruce knocked him out. They then uncuffed Gabriel from his bed and placed him on the gurney, while Bruce put on the cop's uniform and placed him on Gabriel's bed, and fled the place.
Once they were in the car, the party gave Gabriel the choice of either telling them what he knew for some money and a ride to the train station, or be turned over to either the cops or his boss, who would no doubt punish him for his failed mission. Gabriel considered his options, and decided to spill the beans.
Francesco Cortone, a rogue capo of the Calabrian mafia, had taken advantage of their weak head of the family to plan a hostile takeover of the Tarasov family's territories. He did so in collaboration with certain corrupt persons in law enforcement, aiming to use police powers to help him take down the Russians. To this end he bought information about the Tarasov family's businesses, so he could send his men to attack them. These were small skirmishes that did not really affect the Tarasov family's bottomline, but calculated to give the sense that the Russian mob presence in the city was a problem, which would make it harder for the High Table to shield them when the police decided to move against them. Gabriel informed the party that Francesco would be meeting the contact person from law enforcement at a chemical warehouse in Jersey before dawn that day.
Our party planned their attack. After stopping and breaking into a sports goods store for rope, Joseph and Bruce rappelled down the roof of the warehouse and crashed through the second floor windows to reach the catwalk, yelling: Viggo says hello! as they landed. They surprised the thugs guarding the place, who were quickly felled by Bruce's shotgun and Joseph's assault rifle. Through the ground floor windows Jason could see more gunmen rushing to the stairs to get to the catwalk, so he drove the car through the shutter door of the warehouse and joined the fight.
Joseph took down the thugs who swarmed out of the corner office to repel them in a fashion that would make John Wick proud, but the party were stopped in their tracks by a gunman shooting from inside the office, whom Bruce recognised to be Frank Krothers, the District Attorney's bodyguard.
From inside the office, Francesco called out to the party, offering to match and exceed whatever deal Viggo was offering them, but the party was not in a mood to deal. Jason dashed back into the car, and drove it into the steel columns holding up the mezzaine office, causing the office to tilt and Franceso to tumble through the window. Frank Krothers managed to grab him and begin to haul him back, but the brief exposure was enough for Joseph to shoot and kill Francesco. With Francesco dead, Frank saw no reason to stay, and made his escape.
Their job completed, the party called Viggo, and were picked up. Viggo then informed them that he would soon give them an "impossible task" to perform as he completes his revenge against the Calabrian mafia...
Prepping and Running the Game
I compiled the last two sessions in this post as I am way behind my blogging schedule.
The third session of the campaign was based on the modules Badabing Badaboom! and Fuhgeddabouti!. Both provide a central plot, but are valuable for the vignettes, which I picked for my purpose.
The final session was based on the module Burning Crosses, which is a short investigative scenario that provided me with some idea to link Yulian back to the Calabrian mafia without making it too direct.
The scene at the hospital however was improvised. When the players realise they should have taken Gabriel away for questioning instead of letting the police take him, the needed to get to him. I initially said that Bruce knew which station he would be brought to, but immediately realised that it would be more appropriate for him to be brought to a hospital for treatment first; the players agreed, and we moved the action to the hospital. Once the action moved there it was easy to set the scene and orientate ourselves, since the hospital Emergency Room is so widely depicted in media we all had a common understanding of how things look like without me spending too much time describing things.
This was also the case for Dmitri's home, where we all knew what everything looked like, down to how the front door looked. This is one advantage of playing in a modern campaign, which I hadn't really appreciated until now.
The rules were quite apt for our purpose, allowing the characters to do some really cinematic stuff like doing double double-taps in a single round, or running and gunning down four thugs in one round. If we ever do another modern campaign again, I may use the same rules.
For the next campaign we will be returning to Savage Gamma World, when I plan to have one or two guest players join us for each session. More on that in a future post.

We continued our monthly session with a Spanish Civil War game using the Hell & Uncivil Disorder rules. The rules are rather loosely written and ambiguous in places, and we had to make decisions when situations came up during the game which were not specifically dealt with in the game.
The scenario we used was from Atacar es Vencer!, which contains 12 scenarios for platoon-plus size forces, with one or two tanks or armoured cars in some of the scenarios. Though not written for the Hell & Uncivil Disorder rules, it worked pretty well, and provided a tense scenario for both sides. The Republicans managed to fight the Nationalists to a draw, despite having lower quality troops and lacking a tank or any anti-tank guns.
My interest in the Spanish Civil War was sparked many years ago, when I watched this episode of Alas! Smith & Jones:
It took me decades to finally find a set of rules that comes close to what I want a game of SCW combat to feel like, and it's doubly satisfying that this is a group project with figures and vehicles painted by four of us.


To give the plane an orky look I dug up the bits from an Ork Killa Kan I bought a long time ago but never ended up using - I was planning to make a model using a film cannister. I add some orky weapons, I ordered a pack of Orc HMG Tips and a pack of Orc Biker Heads from Puppets War.

For the construction I decided to clip off the wheels so I could fit these horns to the front of the plane and weapons under the wings.

A Gork head adorns the nose of the plane.


After I was satisfied with the set-up, I sprayed the main parts of the model red, and then glued the weapons and orky embellishment to the fuselage and wings.
The plane was pretty plain, so I added checks to the rim of the intake and the tail, and some wedge-shaped decals from the Space Wolves sheet the the wings. I then weathered the model.
This was a fun little project, and I am tempted to do another conversion with an Egg plane soon.