Sunday, April 24, 2011

Random Sunday shot - 1st Squad of my refurbished Space Marines

Here is the first squad of my small Space Marines force.


I can't remember which edition of figures these were, but they came with heads attached to the torso and gems on their aquila instead of skulls. The sergeant figure is a Dark Angels veteran sergeant figure.


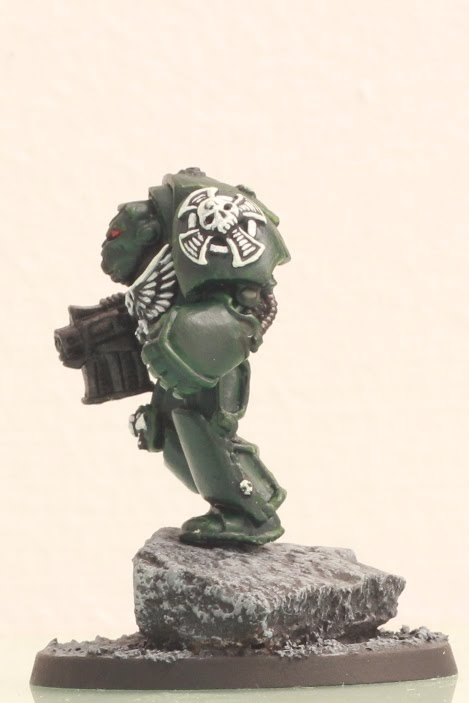
My plan is to have three 5-men combat squads, each with a sergeant holding a close-combat weapon and a bolt-pistol, three troopers with bolters, and a trooper with a heavy weapon. The first squad has a heavy-bolter, here a bit I bought off ebay, so the parts don't really fit exactly. This is my favourite version of the heavy bolter.


I have painted them in Dark Angel green, and you may or may not be able to see that the arms of the heavy-bolter trooper is not an exact shade to the rest of his body. Still, it's close enough, given how more than a decade separates the two bottles of paint used.

Friday, April 22, 2011

Refurbishing my Space Marines

I am almost done refurbishing my small Space Marines force.

This Terminator was actually part of my first Space Marines army, which I started about 20 years ago - the tab on this mini reads '1989'.

It was originally painted in white with gold accents, but I have repainted it in the Dark Angels Green with white accents, to match my second army, and rebased it on a 40mm round base, atop an actual piece of stone I picked up on the way home one afternoon. It will be joined by four other Terminators that I have bought off ebay.

This mini has a total of 8 skulls sculpted on it.


Sunday, April 17, 2011

Random Sunday shots: AT-43 Kolossus as Space Marine Dreadnought

I bought a box of Rackham AT-43 Kolossus to 'convert' into a Dreadnought for my small Space Marine force, and after three weeks and the purchase of additional bits, here it is!

Well, it's not really a 'conversion', since all I did was to paint it the same colour as my Marines, and put on some 40K bits...

In this view you can see all the three bits that I added: a scroll thing on which I wrote the word 'DEATH' (my Marines have an unhealthy obsession with the subject...), a purity seal (instantly converts almost anything to a 40K item), and the skull decal (like I said, they seem obssessed...). The left side of the Dreadnought is totally unadorned.
The base is a 60mm resin base.

Sunday, April 10, 2011

Random Sunday shot: Mule train


I bought and painted these 25mm pack mules from Mega Minis a long time ago, but it's only this last week I finally based them on 40mm round bases.


I hope to use them in a skirmish game soon.

Sunday, March 27, 2011

Strandhogg Fantasy Game 1: Village Raid

We were supposed to play the second game of the FPW campaign this afternoon, but as wahj couldn't make it, Martin and I decided to play something else. I offered him a choice between 15mm Dark Age battles (Dux Bellorum) and Dark Age skirmish (Strandhogg), and he chose the latter... and was surprised when I revealed that I was using goblins vs dwarves! I asked Martin to set up a village while I sorted out the figures and revised the rules. He placed a few buildings in the centre of the table, a fence on two sides and an orchard on the other, and I added a hill, some rocky outcrops, a pond and a pig pen to complete the picture. I gave Martin three goblin warbands, and gave myself two levy warbands to defend the village, and a warriors warband to come in as reinforcements. The goblin objective was to grab as many farm animals as they can before the reinfocrements arrive. We used standard stats except for -1 Courage for the goblins and -1 Agility for the dwarves.

The goblins came on in three columns...


The dwarven defenders formed behind the fence, but as the goblins rushed forward the archers had to drop their bows and prepare for melee.


Immediately it became clear that despite the advantage of defending a linear obstacle, the levy were no match for the seasoned goblin warriors.

One goblin warband tried to slip past the village to get at the pigs, but two alert archers spotted them and sniped at them.

The reinforcements from the local lord arrived belatedly at the village.


Martin pushed his warbands forward quickly, choosing speed over missile power, and two warbands quickly despatched my weak defenders and were soon helping themselves to the goats.


The warband that slipped past the village had to content themselves with grabbing only one pig as the lord's warriors closed in...

but laden with his loot, the goblin warrior lagged behind and was shot!

The warband leader ran away, his men scattered and his hands empty. A bad day for the guy!

The two other warbands had better luck, and made off with several goats.


It was a fun and short game - we took around 2 hours from set-up to completion. This was Martin's first 'fantasy' game, but as there was no overt fantasy element to the game, it wasn't a culture shock to him.

As it turns out Martin has several LOTR figures painted, comprising of some Uruk-hai, Rohirrim and Gondorian. We can certainly look forward to larger multi-player battles in the future.

Random Sunday shots: WIP 3

As I mentioned earlier, my friends' entry into Warhammer and 40K has prompted me to seek out some non-GW figures and models to convert for use with their armies. Two of the nice models which I found are shown below: The model on the left is a Secrets of the Third Reich US Army Comanche mech which comes with a 50mm round base, and the one on the right is a Rackham AT-43 Strielitz Kolossus, which comes prepainted on a 40mm round base.


I had expected the Comanche to be bigger than the Kolossus, but as you can see the Kolossus is both taller and 'longer' than the Comanche.


I had planned to use the Comanche for a Killa Kan, but given its size I had to 'downgrade' it to an Ork Nob in Mega-armour. I simply left the lid off the top of the Comanche, and placed an Orc head inside the compartment. As you can see, shown here on a 40mm base next to a Space Marine, the size is about right.


Given the anatomy of the Orks, I had to use putty to fill up the joint bewteen the torso and the legs, so the shoulder joints will fall in line with the hip joints. I drilled holes in the sides for magnets as I had initially planned to have the figure come with multiple weapon options, but I think I will settle for permanently fixed arms instead.

Sunday, March 20, 2011

Libby on Mastiphant

The painting's done - I'm just going to adding some winter grass on the base and then spray it with matt varnish.

It's been quite a project. Now all I need is a whole barbarian army to go with her...


Random Sunday shots: WIP 2

The weekend allows a bit of work.

I've completed most of the Libby on Mastiphant project, and only the hair and the helm remains to be painted. I've glued the other wing on - hopefully it stays on without further problems from now on... I have been wondering what colour hair to give Libby, but looking at the overall palette now I think black hair will be good.


I also primed up six plastic GW LOTR War riders I bought off ebay. Someone obviously bought them, assembled them, started painting, and then gave up on the project. The quality of the casting is not actually very high, and the area on the rump of the wargs are actually quite smooth. I used epoxy to fill the gaps and sculpted the fur.
Between these guys and the various stuff I have in transit now I should be kept busy for the next few months.

Sunday, March 13, 2011

Random Sunday shots: WIP

Even though I have stopped buying and painting new armies, I still have a dozen or so figures to complete, plus some odd figures and bits left from previous projects, so I decided to do something with them.

The first is an Ork mounted on a boar for my friend's 40K Ork army. I don't know if they are included in the army list these days.

The ork figure is left over from I believe a GW Orc chariot crew. I gave him a bolter from a Space Marine bits. To fit him onto his mount I had to cut the legs off below the knees and reposition them, then fill the gaps with epoxy putty.


His mount is a pre-painted D&D Thundertusk boar, which came with a saddle scupted on but thankfully no rider, so it was a simple job of ripping it off its base, then using some putty to define its reins and fill the gaps in the mould-lines.


In this view you can see the flash-suppressor holes I have drilled through the barrel.

The second project involves a Ral Partha Mastiphant I bought a long time ago to use for a 15mm fantasy army. However, its size was unsuitable and I have been looking for a rider for it off and on over the years. Finally, I decided to buy a Libby figure when I bought a bunch of other stuff from an ebay seller.


The Libby figure is nice but one of the most difficult figures I have worked with - the contact area between the wings and the helmet is small and broke off several times. If I were to start over again I would attach them after I have completed the rest of the figure.
The mastiphant appears to be some sort of a carnivorous mammoth. I could not find a picture of a painted one and so I decided to paint it in a traditional mammoth colour, but do the ears the same way I paint my Indian elephants'. The tusks on the original figure was larger and more impressive, but I used them for another mammoth figure and so had to use the plastic bits off another bit part for it...

Friday, March 11, 2011

Making textured bases

Working on the Duke Gerard figure has inspired me to refurbish my small Space Marine force.

Most of the figures are plastic multi-part figures, and came with bases with no slots. I have previously just glued the figures onto black-primed bases. To match the slate base on the Duke Gerard figure, I tried to make similarly textured bases cheaply.

I used a tub of household putty filler I had around the house. Using the applicator that came with the tub, I applied a layer about 1 to 2 mm thick across the top of the slotless round bases. Using two or three applications at slightly different angle and force, I tried to create the 'layered' look of slate.


After leaving the bases a couple of hours to dry, I applied watered-down white glue to seal the surface. You can see the detail more clearly in this close-up picture.


Once that has dried, I spray it with black primer, and then it's just a quick dry-brush job with medium grey paint and a highlight with light grey. You can see the similarity between the resin base and the DIY base.


Posed with the standard bearer.

Saturday, March 05, 2011

Reaper Duke Gerard Conversion 2 Part 1

I showed my friend the Duke Gerard figure and Blood Angels Death Company weapons bitz I got for him, and he asked me to help him convert it to a proxy for Mephiston - we both agree that the back banner on the Duke Gerard figure looks better than that of the GW Mephiston figure.

Again I start by cutting off the tab and then drilling holes to fix the figure to a resin base and its hands.

Once more I filed off the crosses on the shoulder and hip pads, and removed all the rivets.

I shaved the lion head motif off the chest, and glued a blood-drop decoration shaven off a bolt-pistol in its place, as requested by my friend.


Instead of the shield and bolter combo which I have chosen for my previous figure, my friend asked for a power-sword and bolt-pistol combo instead. This meant I had to clip and file the hilt of the sword in the scabbard of the figure. It wasn't easy given the way the figure was sculpted, but thankfully the mess is partly covered up by the back-banner, and it was on the rear of the figure. We did run into the problem that the sword blade was wider than the scabbard, and did not in fact look like it can fit inside a scabbard, but I guess we couldn't expect everything to be perfect.


Here is the figure shown with the weapons dry-fitted. The 'official' Mephiston holds the power-sword in his left hand, but we only had a spare right arm with sword. He also holds a plasma-pistol instead of a bolt-pistol, but my friend liked the winged blood-drop motif on the bolt-pistol.


A left-oblique view showing the pistol.


A right-oblique view showing the power sword.