
I have been looking for a WW2 German truck to paint as a damaged/abandoned vehicle ever since I completed my wrecked Pak 40 model.
There isn't a lack of 1/72 Opel Blitz or other German truck models on the market, but I have been waiting for Plastic Soldier Company's promised released... until I decided to give up and just get the Academy one, thinking that it was a good price for a detailed model. What I didn't realise was that you actually get only one model and not two, as one might misconstrue from the box art.
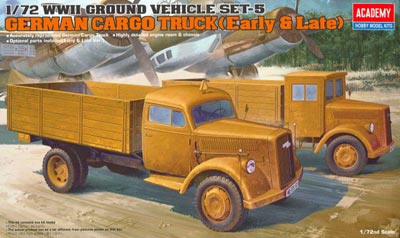 |
| (image from Missing Lynx) |
Nevertheless, it is a very nice kit.
Having obtained the truck, my next question was how exactly was I going to assemble it.
There are many photos of wrecked or damaged WW2 trucks on the internet, but many are hard to duplicate using this kit because it does not have a canopy (and those kits which do have the canvas canopy instead of just the frame, which is what I need because the canvas is usually shown burnt away or else tattered) nor are the tyres separate from the wheels (many of the heavily damaged trucks have their tyres missing or burnt off).
Eventually I decided I would depict a lightly-damaged truck that has been shot at and hence abandoned by its crew. I also decided to try my hand at salt weathering and show the truck in some degree of neglect.
There are many online tutorials on salt weathering, but I followed this one, which gives really clear step-by-step instructions.
Salt weathering is really not as daunting as it sounds, but it does take some practice. My lessons from this first attempt are:
1. Do not just use a single colour for the base layer. In my model you can see that the exposed rust/primer surface is really too uniform to look like weathering. Many painters modelers use several shades of paints or other pigments for their base layer to give a more realistic appearance.
2. Table salt may be too coarse for 1/72 scale models. Some tutorials recommend coarse sea salt for salt weathering, but I think even fine table salt is too large-grained for a 1/72 model. In my next attempt I will grind the salt a little to give a finer grain.
Other than the weathering I added a few touches to give the impression of an abandoned vehicle.
I made the front left tyre flat by melting the tyre with a lighter and then pressing it against a glass surface. This gives the truck a little tilt which suggests that it is not all that well.
I also made broken windows and windscreen using bits of clear plastic from a blister pack, cut randomly and given a wash.
The door and the side of the engine compartment are a single piece in the kit, but I scored along the line and "opened" the doors - after all, the doors must have been opened to allow for the crew to flee or be evacuated.
The whole model was then given a brown wash. I have to add some mud on the tyres and mud guards too.
Over all I am quite happy with the results. Perhaps I should do a wrecked tank next - anyone knows of an easy-to-build German tank kit with separate tracks?
3 comments:
If you find salt is too large, try toothpaste flicked off a brush. Take a bit of care and practise but I've seen it used to good effect!
That's worth a try.
I was thinking about talcum powder...
i don't think talcum powder will work... it will stick on and you will just end up with a grainy surface. It has to have enough mass that it will come off peeling the paint with it.
Toothpaste may work since it is soft and can be wiped off.
Post a Comment